.

Ο λόγος στασίμων 1:1 ενός κεραιοσυστήματος, δεν συνεπάγεται τον 1:1 λόγο μεταφοράς ισχύος, προς την κεραία!
Showing posts with label kit. Show all posts

Tuesday, 3 November 2020

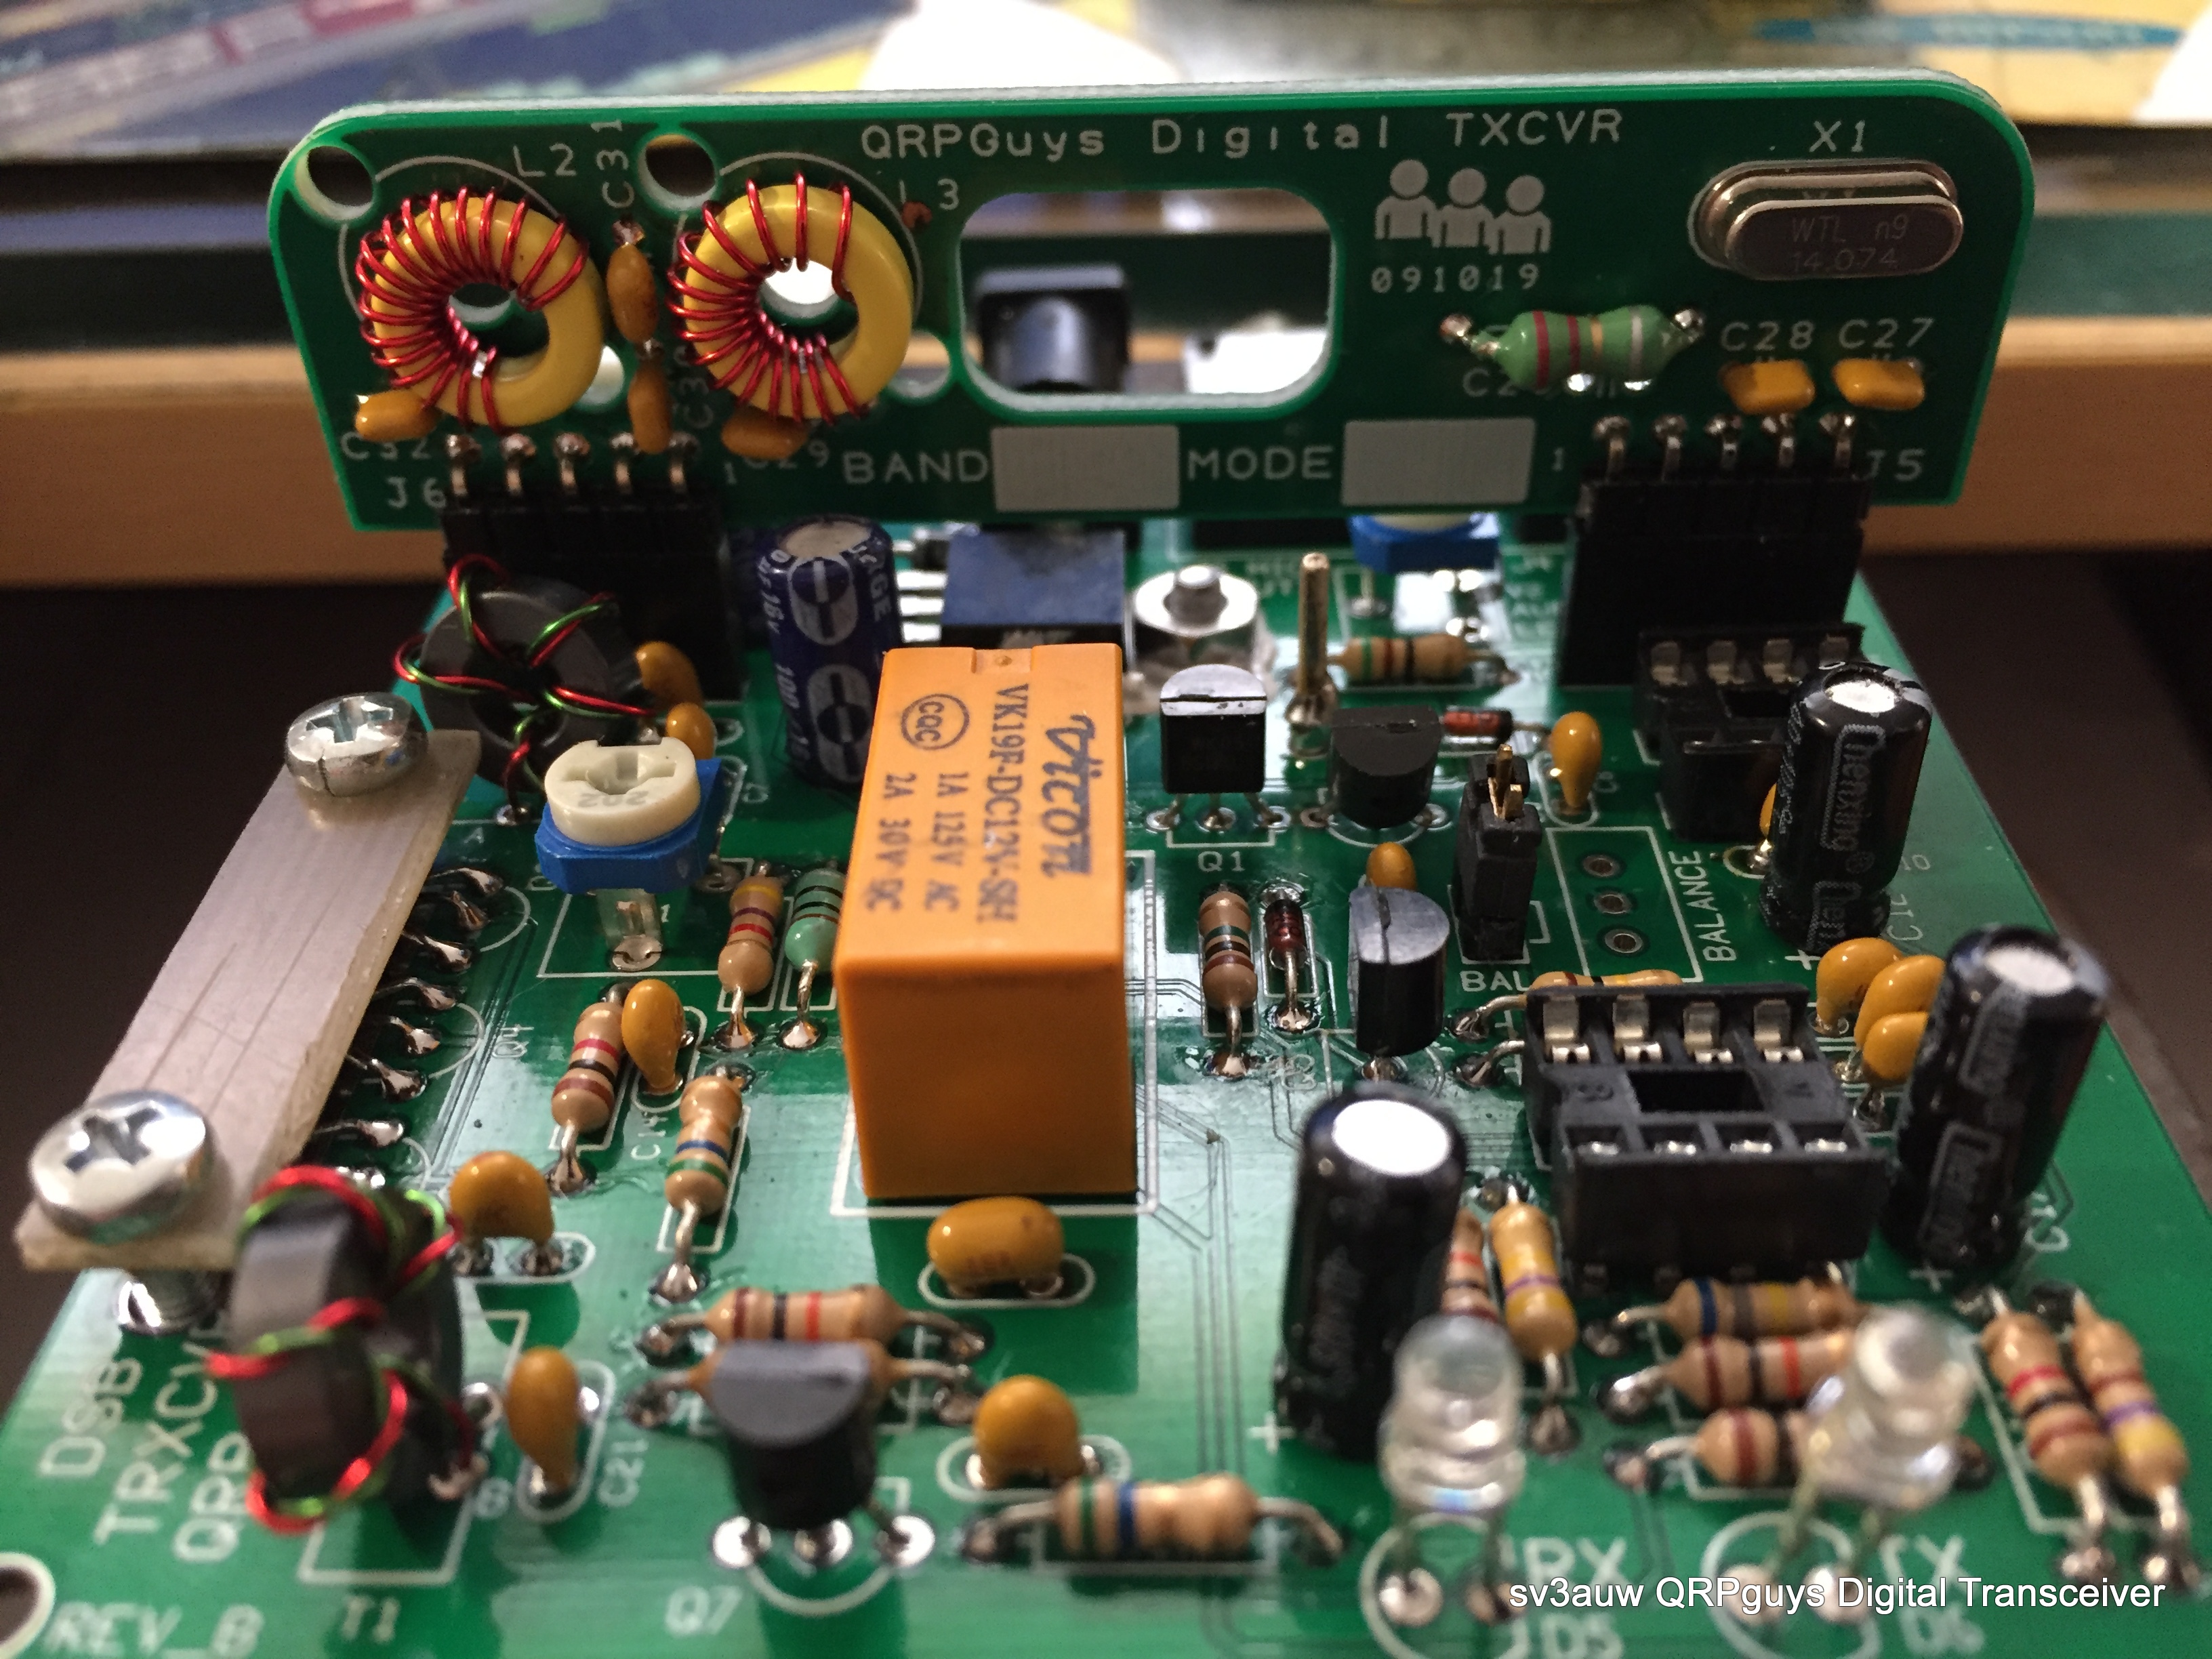
Building a QRPGuys 40/30/20m DSB Digital Transceiver Kit


Though I haven't post something on my blog a couple of months now, that doesn't meant that I was idle.
First on the construction bench sat quoting from their site: 
"...  The QRPGuys DSB Digital Transceiver is a low cost, multiband, DSB transceiver kit, currently with three easy plug-in band modules for 40/30/20m, (additional module pcb’s available). This transceiver is an evolution compiled from various DSB and digital designs on the internet from ZL2BMI, VK3YE, AA7EE, BD6CR, and others. With help from Jim Giammanco, (N5IB) and finally Steve Weber, (KD1JV), we are offering a transceiver with an approximate output of 2.5 watts on 40m, over 1.5 watts on 30m, and over 1 watt on 20m. The receiver sensitivity was measured at .4uV (-115dBm). All the components are included for the main board (3.0″ x 3.12″) and three (40/30/20m) band modules.


The transceiver will run the popular free WSJT-X software (Windows, Linux, or macOS) that requires an accurate time synchronization program, such as Dimension 4, or many of the other free ones available. Users will need two 3.5mm stereo jumpers to your computer or tablet microphone/speaker jacks on the sound card.


The transceiver’s internal VOX circuit will switch to transmit automatically when it senses an audio output signal from the software on the pc or tablet speaker jack. The connections to the transceiver are BNC for the antenna, 3.5mm stereo jumpers to the computer audio jacks, and 12-14 VDC for the pcb mounted 2.1mm pin coaxial power jack. Approximate power consumption is about RX-15mA/TX-350mA. The total weight w/band three modules is 3oz. (85gm). The normal tools required are a soldering iron with a small tip, rosin core solder, and small side cutters. The transceiver can be built in an evening. On a difficulty scale of 1 to 5, 5 being the most difficult, this is rated at 3 depending on your experience. Note also below, plans for building a 3.5″ sq. x 1.0″ high compact chassis from PCB material. ..."


This certain kit is retired now replaced by the Digital Transceiver II kit which has an optional Digital VFO board so the user can choose the Tx frequency and Tx Mode to bands from 160m – 17m.
It can easily constructed in one evening and in my Scale of Difficulty is a fair 2! As long as you are familiar with PCB soldering and toroid cores winding, is a piece of cake!
You can find the old version here but the newer and better is the one I strongly suggest to construct! 
The kit I've constructed gave me 4W on 7.074MHz, 2W on 10.136MHz and 1W on 14.074MHz. Definitely not enough power to set alight the Ionosphere but more than enough to have a constant flow of qso's!
Enjoy your time and @staysafe 
73 de sv3auw/m0lpt

Friday, 30 March 2018

QCX CW kit by Country


Διάβαζα σήμερα τα στατιστικά πωλήσεων του QCX CW kit ανά Χώρα και μετά λύπης μου διαπίστωσα ότι έχουν πωληθεί 10 ή και λιγότερα τέτοια κιτ στην Ελλάδα.
Δεν κερδίζω τίποτα από τις πωλήσεις αυτού του πολύ αξιόλογου, κατά την γνώμη μου - IMHO, κιτ ούτε από διαφημίσεις της Google.
Αντίθετα πιστεύω ότι ο συνάδελφος αγοραστής του, έχει πολλά να μάθει και κατασκευάζοντας το κιτ αυτό καθαυτό αλλά και από την θεωρία η οποία το συνοδεύει στο manual. Όχι μόνο τι κολλά και που, αλλά και το ΓΙΑΤΙ!
Δεκάδες οι "τοίχοι κατασκευών" στο ΦΒ αλλά, εδώ όπου θα δικαιολογούσαν τον τίτλο τους... τίποτα.
Τελικά το CW είναι φίλτρο.
Ξεχωρίζει τους χειριστές ασυρμάτου από τους χρήστες μαύρων κουτιών.

Αν παρ' ελπίδα θελήσετε να το κατασκευάσετε η μπάντα των 40m αποδεικνύεται αυτή με την μεγαλύτερη προτίμηση μεταξύ των άλλων κατασκευαστών!


Wednesday, 18 March 2015

The saga continues!

Rock-Mite 40. The saga* continues!

0(zero) Ohms resistor? Well, it's look like the prefect conductor to me!

More components populated the rock-mite board up to the last two T1 and T2 toroid transformers.


*saga. any piece of writing that tells of heroic events or deeds

Sunday, 15 March 2015

Rock Mite-40 QRP kit


Spring is coming so I decided to rejuvenate my mood after a long idle winter, by building a rock-mite 40.
The kit bought from China (where else!) and it came the typical Chinese way. An envelope containing a plastic bag full of components. No manual, no instructions other than "you friend go my site. you read manual weld kit enjoy afterward"!


I promptly done that and "reading manual", I found a lot of mismatches between the schematic diagram and the components values in the component inventory.
For example R3 on the schematic has a value of 0(zero?!) Ohms whereas in the instruction leaflet has a value of 220Ohm.

Nevertheless I bite the bullet and I started the construction.

As usual I started with the smallest components ie the capacitors and I continued with the resistors, mounting almost all of them on vertical position.
I'll let you know the progress.


Thursday, 1 November 2012

Τετραγωνίζοντας τον κύκλο!

ή μάλλον, κάνοντας κυκλικό το τετράγωνο!


Δεν έχω αποφασίσει για την οθόνη του DDS VFO ακόμα. Δεν έχω κατασταλάξει για το αν θα είναι με λευκό φωτισμό όπως στο διαφημιζόμενο κιτ ή αν θα είναι το "κλασικό" πράσινο. Χωρίς να αποκλείω και την πιθανότητα του πορτοκαλί!
Έτσι χρησιμοποίησα "προσωρινά" την οθόνη από ένα L/C meter κιτ, το οποίο περιφέρεται ημιτελές από συρτάρι σε συρτάρι! (ίσως αυτός είναι ο λόγος για τον οποίο δεν το έχω τελειώσει κάποια χρόνια τώρα. Όταν το αναζητώ, αυτό έχει αλλάξει διεύθυνση!)


Χρησιμοποίησα λοιπόν το ειδικό laser κατευθυνόμενο εργαλείο, βλέπε-χάρτινη-λίμα-νυχιών-της-Αλεξάνδρας, και το αποτέλεσμα ήταν ο "κυκλοτισμός!" του τετραγώνου.

Σε νέα ανάρτηση θα σας δείξω το αποτέλεσμα! (αφού θυμηθώ να κολλήσω κιόλας, το ποτενσιόμετρο για την ρύθμιση της φωτεινότητας της οθόνης!)

Thursday, 18 October 2012

Περισσότερος πομποδέκτης!

Σήμερα κόλλησα τον σταθεροποιητή τάσεως στο DDS VFO και τύλιξα τα πηνία του πομποδέκτη.
Επίσης, ασχολήθηκα με την... μαγειρική!
Το LM7805 χρησιμοποιεί την πλακέτα ως ψήκτρα γιαυτό αν και δεν φαίνεται, δεν παρέλειψα να βάλω θερμοαπαγωγή πάστα.
Αν και με πρόβλημα στην εστίαση, μπορείτε να δείτε το τύλιγμα των toroid.
Μία φορά από το κέντρο, μία σπείρα!
Δύο φορές από το κέντρο δύο σπείρες!
Τρεις... τρείς σπείρες!
Αξίζει να θυμάστε ότι αν δεν μπορείτε να μετρήσετε τις μέσα σπείρες, μπορείτε να την μετρήσετε από την έξω πλευρά.
Σε αυτήν την περίπτωση ο αριθμός των σπειρών θα είναι ΜΙΑ ΣΠΕΙΡΑ ΛΙΓΟΤΕΡΗ!

Το χαλκόσυρμα αν τραβηχτεί/τεντωθεί ή περάσει ρεύμα από μέσα του σκληραίνει (annealing θα δείτε να το γράφουν).
Το ίδιο κι αν βράσει! 
Αν δε προσθέσετε και λίγο κίμινο, βγαίνουν κάτι σουτζουκάκια μούρλια!!!

Όπως μπορείτε να δείτε, η πλακέτα έχει όλες τις τρύπες επιμεταλλωμένες. Κατά προέκταση δεν ήταν δυνατόν οι κρύσταλλοι να ακουμπούν "πρόσωπο" στην πλακέτα διότι θα βραχυκύκλωναν.
Δίπλωσα ένα κομμάτι χαρτί και το χρησιμοποίησα ως αποστάτη έτσι ώστε να τους κολλήσω ένα χιλιοστό ψηλότερα.
Αυτό και για τον ταλαντωτή του VFO.


Αύριο αν δεν έχω κάτι καλύτερο να κάνω, μπορεί κόψω και να στραντζάρω μερικά κομμάτια λαμαρίνας για να θωρακίσω την περιοχή του BFO και του κρυσταλλικού φίλτρου!   

Wednesday, 17 October 2012

MST-400 transceiver

Μετά την εργασία και ξεκούραση, ήρθε και χαρά!
Έχω αρχίσει και κατασκευάζω το MST-400!
Όπως μπορείτε να δείτε στην φωτογραφία, ελάχιστα εξαρτήματα υπολοίπονται, χωρίς να υπολογίσετε τα πηνία τα οποία θα τα τυλίξω αύριο(σήμερα).
Επίσης κατασκευάζω και το DDS VFO κι έχω "κολήσει" στις αντιστάσεις των 200Ω και 30ΚΩ αντίστοιχα.
Λίγο δύσκολα νούμερα για το συρτάρι μου.
Αν δεν τα βρω το ΠαρασκευοΣάββατο στο G-QRP convention στο οποίο θα έχω την χαρά να πάω άλλη μία φορά, θα τα ψάξω στην Farnell.
Αυτά για την ώρα και μείνετε συντονισμένοι στις... οθόνες σας!!!